
The rise of Machine Learning (ML) in today’s society is a phenomenon not to be overlooked. The reliance on technology “to understand and deliver” is becoming more and more possible. A big part of this is improving the speed and efficiency of machine learning models’ understanding of human language via Natural Language Processing (NLP).
About Deep Learning
Deep learning refers to a subset of machine learning that focuses on training artificial neural networks with multiple layers to learn hierarchical representations of data. These neural networks, known as deep neural networks, are capable of automatically extracting intricate features and patterns from complex data like language.
In the field of natural language processing, deep learning has been instrumental in transforming the way computers understand and process human language. By leveraging deep neural networks, researchers and developers have achieved significant advancements in various language-related tasks, such as speech recognition systems and transcription. This has paved the way for voice-controlled devices, interactive voice response systems, and voice assistants like Siri and Alexa.
Falcon: An Innovative LLM
To understand Falcon, it is important to first know Large Language Models, commonly known as LLMs, which are machine learning models trained to understand large texts and generate or predict new content.
Falcon is an open-source LLM launched by the Technology Innovation Institute characterized by top performance in the field. It has significant applications in the fields of language comprehension and text/ response generation. This model is offered in two sizes: Falcon-7B, which typically requires only a single GPU, and Falcon-40B, which requires multiple GPUs and will be used in this article.
In this tutorial, we will be diving into harnessing the power Falcon-40B using Amazon SageMaker to optimize the hosting, deployment, and use of such models. SageMaker features large model inference deep learning containers (LMI DLCs) which are optimized to handle such models that require high memory and complex computations. On the backend, these containers can distribute model parameters and computations between several GPUs.
What is SageMaker?
Amazon SageMaker is a fully managed service by AWS for building, training, and deploying machine learning models. It provides a comprehensive set of tools and capabilities, including data preparation, model training, and deployment. With SageMaker, users can create and manage training environments, choose from built-in algorithms or bring their own models, and benefit from automated model tuning and distributed training. It simplifies deployment with managed hosting and scalability for real-time inference, while offering built-in monitoring and logging features. In short, SageMaker accelerates the development and deployment of intelligent applications with its ease of use and scalability.
How about Hugging Face?
Hugging Face is a company responsible for the development of the open-source library “Transformers”, which provides a wide range of pre-trained models which includes various NLP tasks, like large language models with impressive performance. Hugging Face also offers the Hugging Face Model Hub, a platform to find, share, download, and edit pre-trained models. This tutorial will assume your model is on Hugging Face to benefit from Amazon SageMaker’s new integration with this platform.
Overview
The main steps to take your model from trained and stored to deployed and usable in Amazon SageMaker are:
Reference the model: Define your model in Amazon SageMaker, specifying the necessary information such as the container image, model artifacts, and any configuration specifications.
Create an endpoint configuration: Configure the endpoint settings, including the instance type, instance count, etc. and be sure to specify the LMI DLC as the container image for the endpoint.
Deploy the endpoint: Start the deployment of your model by creating an Amazon SageMaker endpoint using the previously defined endpoint configuration.
Cleanup: Remove resources you no longer need
Before starting
Using SageMaker offers plenty of options to fine-tune your model deployment, which you can use to maximize the throughput and inference power of your model.
First and foremost, choose your instance size and type based on your model’s size, parameters and memory requirements. For example, most models require GPU acceleration for enhanced performance and inference speed and SageMaker recommends ml.g4 or ml.p3, which are GPU-backed instances.
To increase throughput, SageMaker features a batch transform functionality, which allows you to perform inference on your model’s input data offline and process the data in parallel. Moreover, to further reduce your model’s inference latency, you can leverage the Result Caching feature to store frequently accessed results and Result Aggregation to collect multiple requests into a batch.
After deploying your endpoint to use your model, it is best to configure automatic scaling provided by SageMaker to dynamically adjust the number of instances based on the inference traffic.
Walkthrough
Note: To write and run commands and code, you can use SageMaker notebook instances or SageMaker Studio notebooks.
Find Amazon SageMaker
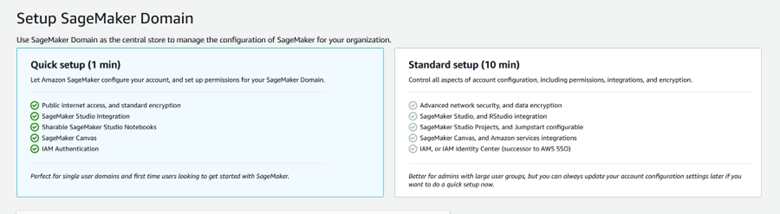
After logging into your account on the AWS Management Console, search for the SageMaker service. If it is your first time using this service, you will be prompted to create a SageMaker domain.
Set Up a SageMaker Domain to be able to use SageMaker Notebooks
Create the necessary roles to be able to access other AWS services through SageMaker, particulary S3.

Choose the VPC within which your SageMaker Domain will be defined

While AWS sets up your SageMaker domain, its state will be pending, as shown below:

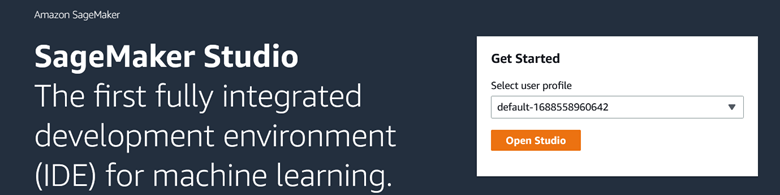
When the domain is in service, you can now use the Notebook Studio to write your code and create your files.

Open your SageMaker Studio with the same user profile as your SageMaker domain:
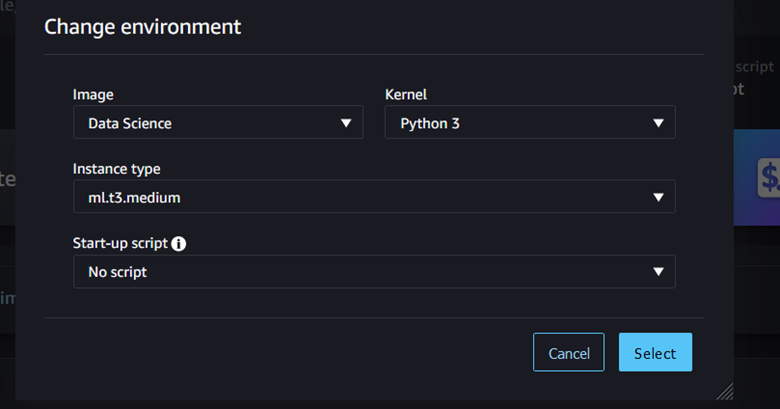
Open a notebook and begin coding:
Import the sagemaker dependencies
					import sagemaker

from sagemaker import image_uris

import boto3 #library to access S3 and SageMaker programmatically

import json
Define your SageMaker session
					sage_session = sagemaker.session.Session()

role = sagemaker.get_execution_role()

region = sage_session._region_name

maker = boto3.client("sagemaker")

runtime = boto3.client("sagemaker-runtime")
Define & Upload your model to S3
Create your local folder
!mkdir -p code_container
Create the configuration file specifying the falcon-40B model
					%%writefile ./code_container/serving.properties

engine=Python

option.model_id='tiiuae/falcon-40b'

option.tensor_parallel_degree=4
It should contain the id of the Hugging Face model to be uploaded to s3, the number of GPUs required on the instance.
Create a text file to contain PyTorch package version to be installed
					%%writefile ./code_container/requirements.txt
einops
torch==2.0.1
Create the model.py file in the same directory:
					%%writefile ./code_container/model.py

from djl_python import Input, Output

import torch

from transformers import pipeline, AutoModelForCausalLM, AutoTokenizer
import os

predictor = None

def get_model(properties):
    model_name = 'tiiuae/falcon-40b'
    local_rank = int(os.getenv("LOCAL_RANK", "0"))
    model = AutoModelForCausalLM.from_pretrained(
        model_name,
        low_cpu_mem_usage=True,
        trust_remote_code=True,
        torch_dtype=torch.bfloat16,
        device_map="auto",
    )
    tokenizer = AutoTokenizer.from_pretrained(model_name)
    generator = pipeline(
        task="text-generation", model=model, tokenizer=tokenizer, device_map="auto"
    )
    return generator


def handle(inputs: Input) -> None:
    global predictor
    if not predictor:
        predictor = get_model(inputs.get_properties())
    if inputs.is_empty():
        return None
    data = inputs.get_as_json()
    text = data["text"]
    text_length = data["text_length"]
    outputs = predictor(text, do_sample=True, min_length=text_length, max_length=text_length)
    result = {"outputs": outputs}
    return Output().add_as_json(result)
This file contains integral functions which will deal with text generation and use the model.
The get_model() function initializes and returns a generator object for text generation using the tiiuae/falcon-40b model. It loads the model using AutoModelForCausalLM. from_pretrained() and the tokenizer using AutoTokenizer. from_pretrained(). The generator is created using the pipeline() function from Transformers.
The handle() function is the entry point for processing input data. It checks if the model has been initialized, and if not, it calls the get_model() function to initialize it. It then processes the input text using the generator and returns the generated outputs as a JSON response.
To package the directory into a *.tar.gz file and upload it to Amazon S3:
import tarfile
import gzip
import shutil
import os
def create_tar_gz(source_file, output_file):
with tarfile.open(output_file, "w:gz") as tar:
tar.add(source_file, arcname=os.path.basename(source_file))
source_file = "/root/code_container"
output_tar_gz = "/root/code_packaged.tar.gz"
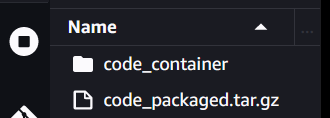
create_tar_gz(source_file, output_tar_gz)
bucket = sage_session.default_bucket()
uploaded_s3 = sage_session.upload_data("code_packaged.tar.gz", bucket, 'code_container/deepspeed')
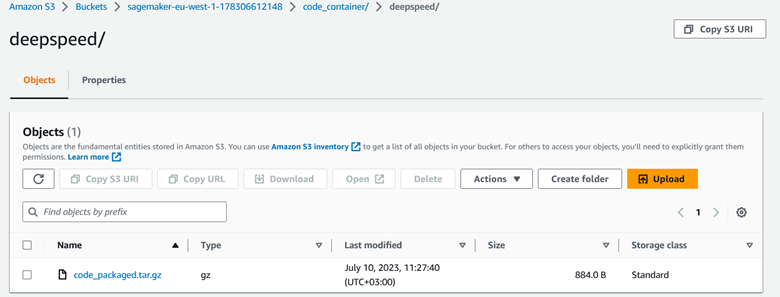
You will find the packaged folder in the root directory of the notebook, as shown below:
You can use this code to confirm where your packaged file has been uploaded in S3:
To see your S3 bucket, search for S3 in the AWS Management Console. The created bucket’s name should begin with sagemaker and contain your packaged file. Here is an example of the bucket created for the uploaded file:
To create the falcon40B model using SageMaker:
					from sagemaker.utils import name_from_base

inference_image_uri = (

            f"763104351884.dkr.ecr.{region}.amazonaws.com/djl-inference:0.22.1-deepspeed0.8.3-cu118"

)

model_name_acc = name_from_base(f"falcon40b-model-ds")

create_model_response = maker.create_model(

            ModelName=model_name_acc,

            ExecutionRoleArn=role,

            PrimaryContainer={"Image": inference_image_uri, "ModelDataUrl": uploaded_s3},

)
Deploy your endpoint with your instance specifications
To find your model name, print your model’s ARN.
The model name is found within the printed text, which is in the following format arn:aws:sagemaker:<region>:<account-id>:model/<model-name>.
To create your endpoint with its configuration settings, such as the instance type you would like to run it on, use the create_endpoint_config and create_endpoint methods.
					model_name = "falcon40b-model-ds-2023-07-11-07-40-35-915" #replace with your created model name
endpoint_config_response = maker.create_endpoint_config(
    EndpointConfigName='falcon40b-model-ds-cf',
    ProductionVariants=[
        {
            "VariantName": "falcon40", #any unique name
            "ModelName": model_name,
            "InstanceType": 'ml.g5.24xlarge',
            "InitialInstanceCount": 1,
            "ModelDataDownloadTimeoutInSeconds": 3600,
            "ContainerStartupHealthCheckTimeoutInSeconds": 3600,
        },
    ],
)

create_endpoint_response = maker.create_endpoint(
    EndpointName='falcon40b-model-ds-endpt', EndpointConfigName='falcon40b-model-ds-cf'
)
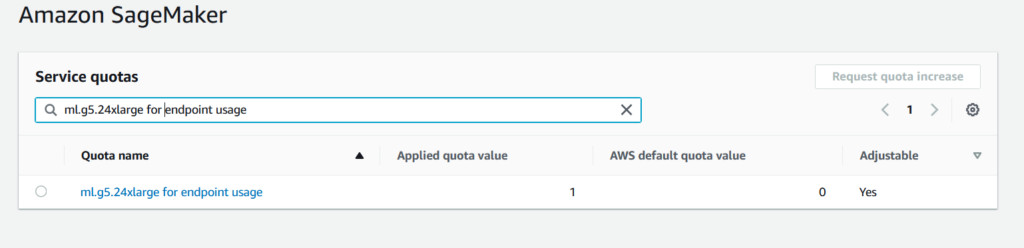
In case you encounter a ResourceLimitExceeded error, you can head to the AWS Service Quotas console and request a Quota increase for the number of such types of EC2 instances that you can create.
Search for the Service Quotas service in your Console search bar:
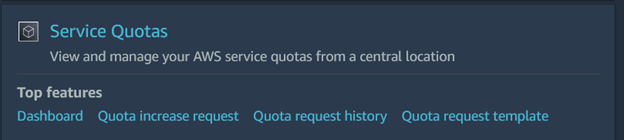
Search for the Service Quotas service in your Console search bar:

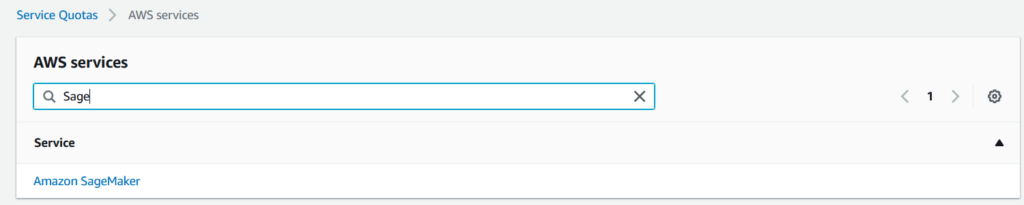
Search for SageMaker:
Search for ml.g5.24xlarge for endpoint usage, select it and Click ‘Request Quota Increase’:
Specify the quota value to 1:

You may proceed when AWS notifies you that your Quota Increase request has been approved.
Test your endpoint with custom input data and parameter values
After calling the method to create the endpoint, you may have to wait until the creation process is complete. In the meantime, you can check some properties of your endpoint using the describe_endpoint method.

As shown above, the status of the endpoint is ‘Creating’. During this period, you won’t be able to invoke the endpoint. Calling the invoke_endpoint method will result in an error informing you that the endpoint, which you are attempting to use, is not found. The time it takes for an endpoint to transition from the “Creating” status to the “InService” (ready to use) status depends on the complexity of the model, the size of the model artifacts, the instance type and count configured for the endpoint, the network conditions, and the current load on the service.

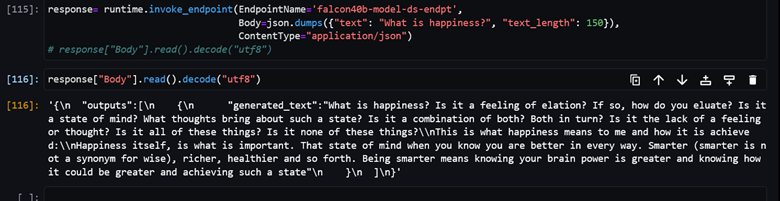
To call your endpoint with your text or question input, use the invoke_endpoint method as shown below.
					response= runtime.invoke_endpoint(

            EndpointName='falcon40b-model-ds-endpt',

            Body=json.dumps({"text": "How do I write a professional email?", "text_length": 150}),

            ContentType="application/json",

)
response["Body"].read().decode("utf8")  #to read the content of the response
The applications of this Machine Learning Model, which you can utilize using SageMaker at your convenience, are astounding.
Below are some example questions/text prompts that demonstrate the exciting and vast domain of NLP and the speed at which this model can understand your input and respond.
You can ask simple questions like: How can I write a professional email?

Use response["Body"] .read() .decode("utf8") to print the text generated by the mode

You can also take the more philosophical route and find out the meaning of happiness:
Cleanup
Finally, to protect against extra costs and resource expenditure, remove the resources created when done
					maker.delete_endpoint(EndpointName=endpoint_name)

maker.delete_endpoint_config(EndpointConfigName=endpoint_config_name)

maker.delete_model(ModelName=model_name)
Below is the response you should get when all deletions are successful.
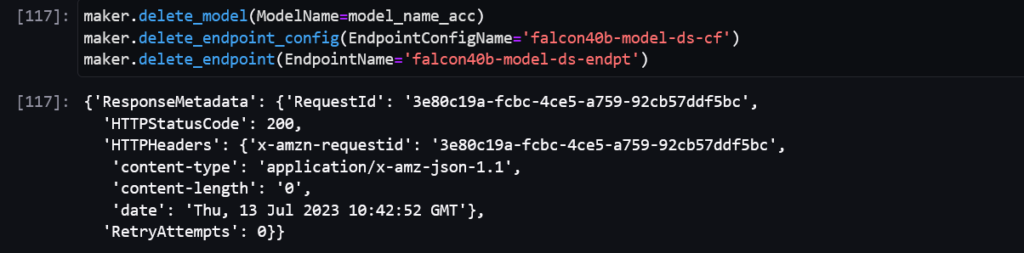
Be sure to stop the running Studio notebook instances and delete the corresponding S3 bucket when you are done as well so as not to incur unnecessary ongoing costs. You may also delete your SageMaker domain if you no longer need to use SageMaker services, such as Studio.
Key takeaways
S3 Optimized for Data Reading:
Using Amazon SageMaker to host and deploy your LLMs also has multiple less evident benefits, such as integrations with Amazon S3, which is capable of handling data reading for LLMs with large workloads and automatically scales to handle increased request rates for data.
Parallelism:
There is no need to write distributed code and specify synchronization strategies to achieve parallelism as the SageMaker jobs APIs, SageMaker Training and Processing, run your code one time per machine when launching a job with multiple machines.
Deep Learning Support:
SageMaker supports popular deep learning frameworks like TensorFlow and PyTorch, providing pre-configured containers and deep learning libraries to facilitate and optimize the deployment of models based on such technologies
Ethics and Compliance:
Security features, access controls, monitoring, and compliance certifications help implement policies to deploy and use LLMs ethically, ensuring transparency and accountability.
Conclusion
Amazon SageMaker is instrumental in accelerating the deployment of Falcon 40B and similar large language models (LLMs). With SageMaker’s scalability, efficiency, cost optimization, and integration with the AWS ecosystem, organizations can leverage the power of Falcon 40B for a variety of natural language processing tasks. SageMaker simplifies the deployment process, automating infrastructure management and providing the necessary computational resources, allowing for seamless and cost-effective inference. As the field of machine learning and language processing grows, Sagemaker plays an increasingly vital role in the integration of such models into applications.