
Amazon SageMaker has become a go-to platform for developing and deploying machine learning models. With its powerful capabilities, SageMaker simplifies the process of building and deploying models, enabling developers to leverage the potential of language understanding in their applications. By building an intuitive UI, we can provide users with a user-friendly way to input text and receive real-time predictions from various models.
Throughout this tutorial, we will cover the step-by-step process of setting up the connection between the UI and the SageMaker NLP endpoint, focusing on crucial aspects, such as API integration. By the end of this guide, you will have a clear understanding of how to design and implement a UI that interacts with a SageMaker endpoint.
Craft your UI using AWS Amplify templates
You can leverage Amplify to create and deploy your front-end webpage, which you will use to send messages and questions to your SageMaker endpoint.
First off, visit Amplify Studio, containing customizable UI components that you can use to create the webpage you have in mind and export it as a code project in the programming language of your choice.
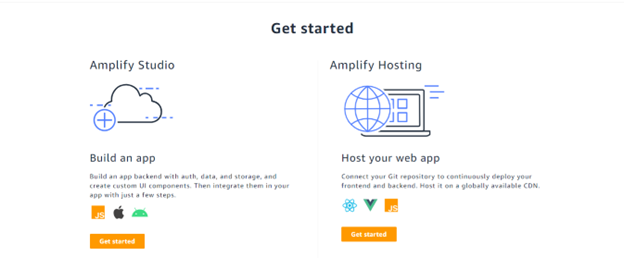
From the AWS Amplify homepage, click Get started to continue to Amplify Studio:
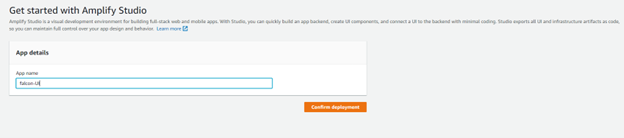
Give your application a descriptive name:
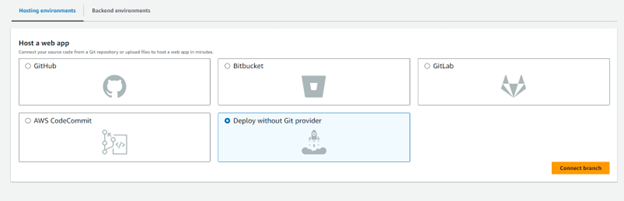
In hosting environments, choose ‘Deploy without a Git Provider’:
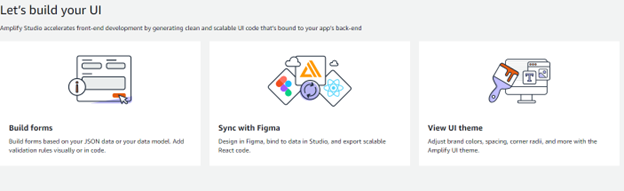
In this example, we will utilize Amplify to make a simple form, but one could also use it to import advanced designs from Figma and create webpages from them:
To allow user to write input to talk to your SageMaker model endpoint, create a blank form and name it:

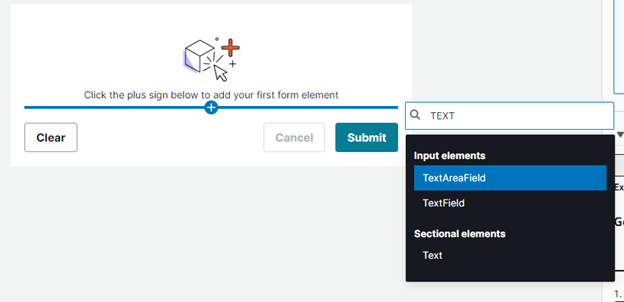
You will be redirected to a page to design your desired form. Click the plus sign to choose new elements to add from the drop-down menu.
After customizing your webpage design with the given elements, follow the instructions on the right-hand side, containing the corresponding terminal commands for dependency installation and code project creation. Open the terminal on your local machine and execute the code to download the dependencies. To retrieve your form’s corresponding code onto your local machine, use the amplify pull command as shown below:

For a web application, choose JavaScript:

Depending on the front-end framework that you prefer, you have the option to automatically create your project in any of the following. This tutorial will use React.

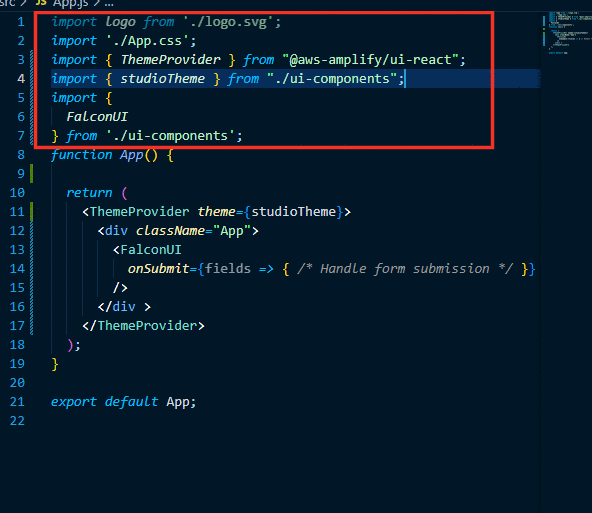
An example of using the Amplify-generated React component as instructed in the App.js file with the imports in the App.js file as instructed in Amplify Studio highlighted below:
To be able to make a request as specified in your API (to be seen later), use the fetch method in React to send the user input to the back-end. Most notably, specify the api invoke url with the resource path appended at the end (you will get these from API Gateway in following steps) , method, the headers X-Api-Key and Access-Control-Allow-Origin which will respectively allow for Authentication and CORS verification, and the body containing the user’s message to be processed by the SageMaker endpoint in the backend.
For security purposes it is better to save your API Key as an environment variable before you use it.
To call this function, retrieving the generated text from SageMaker, pass your user’s message as follows, and use the data returned in your webpage by converting the response to JSON format and accessing the generated_text property’s value within the JSON object.
					async function fetchResponse(fields) {
    try{
      const response = await fetch(
        "Your-API-INVOKE-URL/PATH-OF-YOUR-RESOURCE",
        {
        method: 'POST',
        headers: {
          "x-api-key": apiKey,
          "Access-Control-Allow-Origin": "http://localhost:3000", #To allow access for your undeployed webpage
        },
        body: JSON.stringify({'message': fields}),
      });
      const data = response.json();
      return data;
  }catch (error) {
    console.log('Error:', error);
    throw error;
  }
  }
					fetchResponse(fields).then(data => {
                  data = JSON.parse(data);
                  updateText(data.outputs[0].generated_text);
                })
                .catch(error => {
                  // console.log('Error:', error);
                });
Setting up the Back End:
Create a Lambda Function
The purpose of this Lambda function is to invoke your SageMaker endpoint whenever the API is accessed.
The steps on how to make your SageMaker endpoint are in the first blog post in the series with special configurations mentioned at the end of this article. First, you must ensure that the status of the endpoint is InService. To do this, search for the SageMaker service in the AWS Management Console, and navigate in the sidebar to Inference > Endpoints.

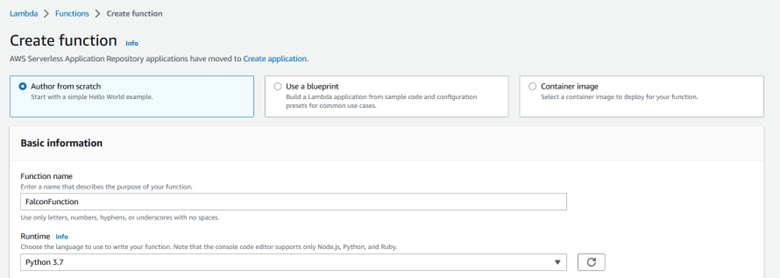
To create a Lambda function, search for the Lambda service in your AWS Management Console and click ‘Create Function’:

In the next step, choose the option to ‘Author from scratch’, name your function, and choose the programming language. This tutorial uses the latest version of Python for the function code.
For the execution role, select a new role with basic Lambda permissions as shown below. This is crucial to provide the function with the necessary permissions to function as planned and access other AWS services and resources.

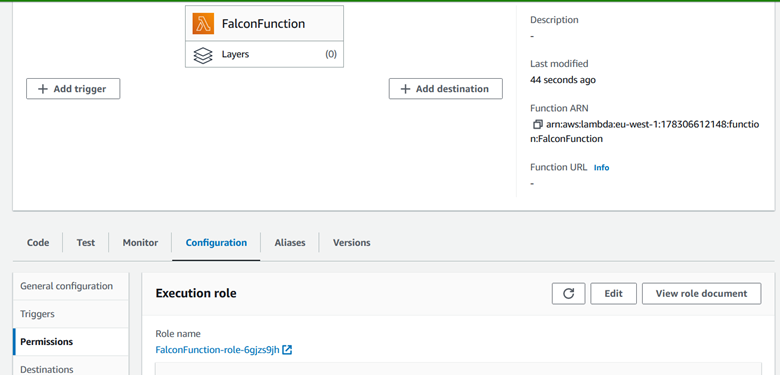
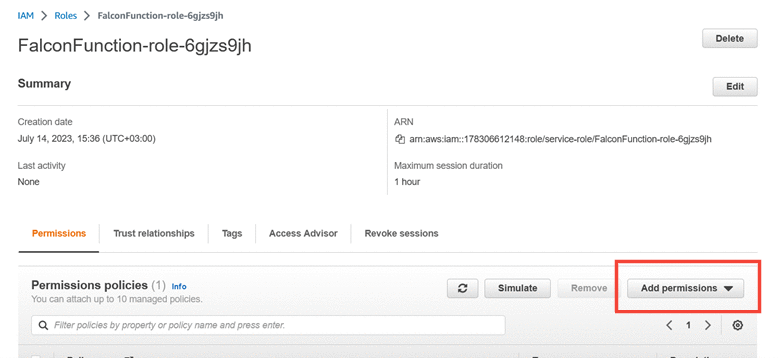
After creating the function, the execution role should show up in the Configuration tab of the function as shown below:
Click the execution role to be redirected to the specific permission policies included in your function’s role, and select ‘Add permissions’:
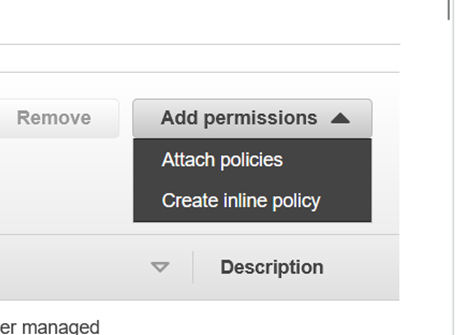
You will need to add permissions to the Role by clicking ‘Create inline policy’:
This action redirects you to the page for policy creation where you will click ‘JSON’ to be able to write a JSON description of the required permission in the editor.

The following is the JSON form of the required permission which enables the Lambda function to invoke any SageMaker Endpoint.
					{
    "Version": "2012-10-17",
    "Statement": [
        {
            "Sid": "VisualEditor0",
            "Effect": "Allow",
            "Action": "sagemaker:InvokeEndpoint",
            "Resource": "*"
        }
    ]
}
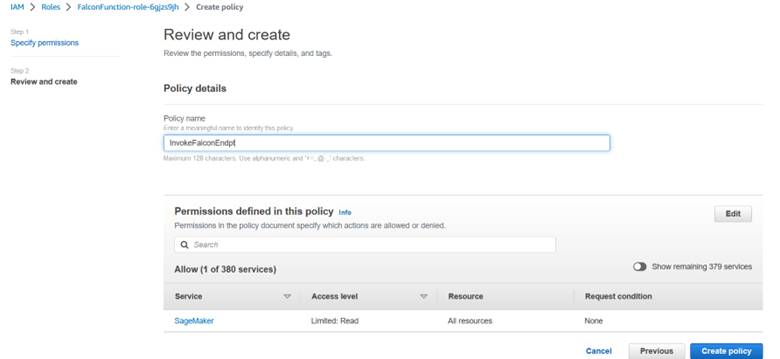
Then you will name your policy, and, as you can see, the associated permission added allows reading from SageMaker
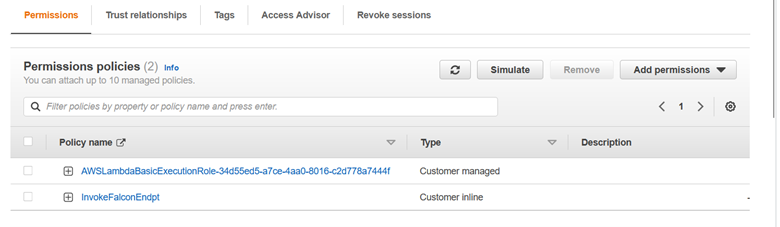
To confirm that the permission has been successfully added to your Lambda function’s role, check the Permissions tab of the role, and you should see a new permissions policy in the list, similar to what has been shown below:
Now that the permissions have been set up, back to the Lambda function. The Lambda function’s task is to interact with the SageMaker endpoint when requested.
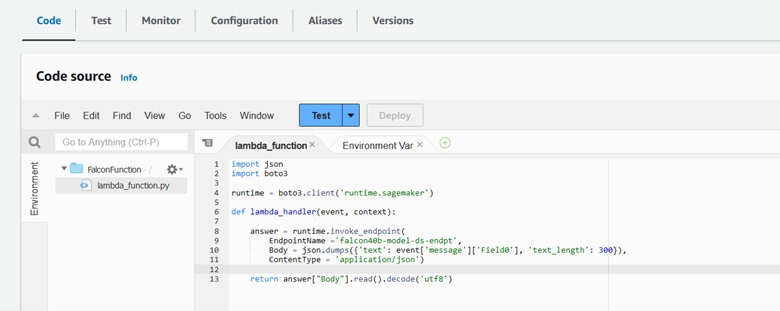
Thus, the following code will be added to the editor in the Code tab of the function:
					import json
import boto3
runtime = boto3.client('runtime.sagemaker')

def lambda_handler(event, context):

    answer = runtime.invoke_endpoint(
        EndpointName ='falcon7b-model-ds-endpt',
        Body = json.dumps({'text': event['message']['Field0'], 'text_length': 300}),
        ContentType = 'application/json'
    )

    return answer["Body"].read().decode('utf8')
This will invoke the endpoint, sending the user message from the front-end as input to the endpoint, and return the response decoded to the front end through the API.
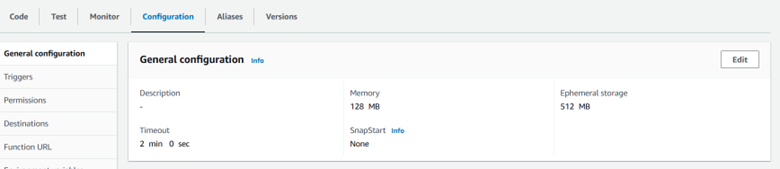
Note: One last thing to edit is to increase the timeout (for example 2 minutes). Note that typical execution will not exceed 20 seconds. To do this, go to the ‘Configuration’ tab of the Lambda function, and click ‘Edit’ in the General Configuration section.

AWS API Gateway
APIs can be used to expose your Lambda function for use in applications, so that your Lambda function is triggered when this API is accessed by end-users.
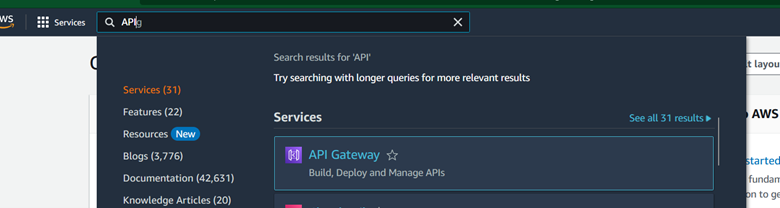
To create your own API, search for the API Gateway service in the AWS Management Console.
Create a new API

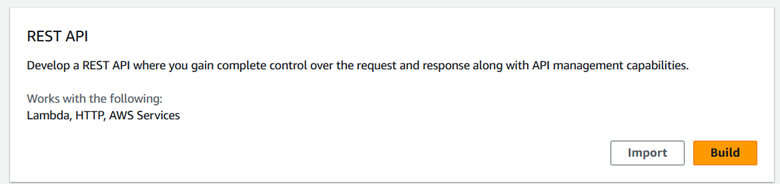
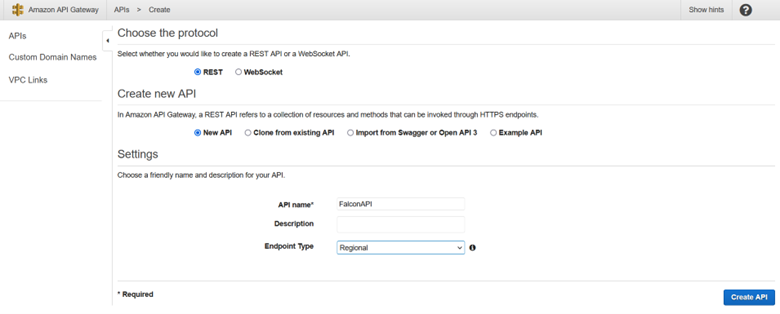
You will be redirected to a page with several options for the types of API, but for this tutorial we shall use REST APIs. Click ‘Build’.
Choose REST and ‘New API’. Then, give your API a good name, and leave the endpoint type as ‘Regional’.
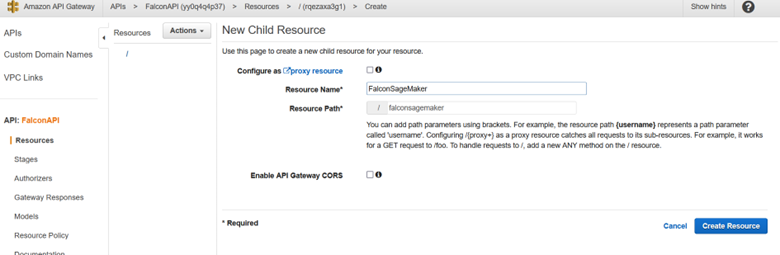
Once the API is created, in the Resources section, click on ‘Create Resource’ in the Actions drop down menu.

Name your child resource
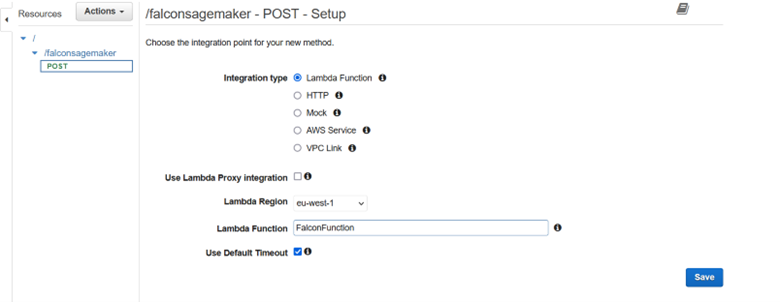
From within the resource you have just created, click ‘Create Method’ in the Actions menu:

Choose the type to be a POST method, as we will be sending data from the webpage in the body of the request.

Once you confirm the type, this will redirect you to an editor to specify the details of your POST method. This includes the integration type, which should be set to Lambda so that your API can trigger your Lambda function’s execution. For the Lambda Function input field, enter the name of the Lambda function that you created in the previous section. Finally, save these options to create the POST method.
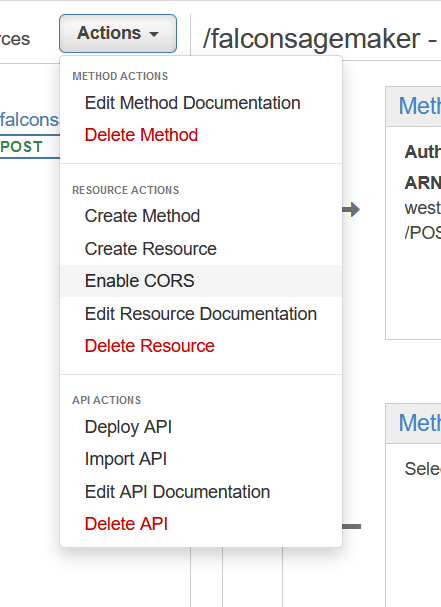
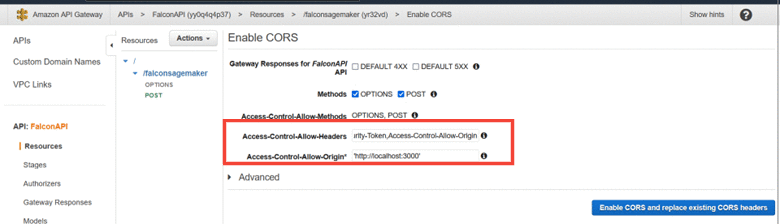
In the Actions menu, click ‘Enable CORS’ to allow our webpage to access this API from its origin.
The fields we will edit in this page are: Access-Control-Allow-Headers where we will add ‘Access-Control-Allow-Origin’ to the comma-separated list, and Access-Control-Allow-Origin where we will input ‘http://localhost:3000’ in order to allow our webpage, running locally on port 3000 to call this API without errors.

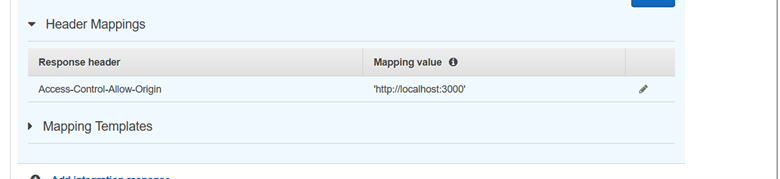
To ensure that this, setting has been set right, this will show in the Header Mappings section of the API’s Integration Response page (You can find this in the main page of your POST method):
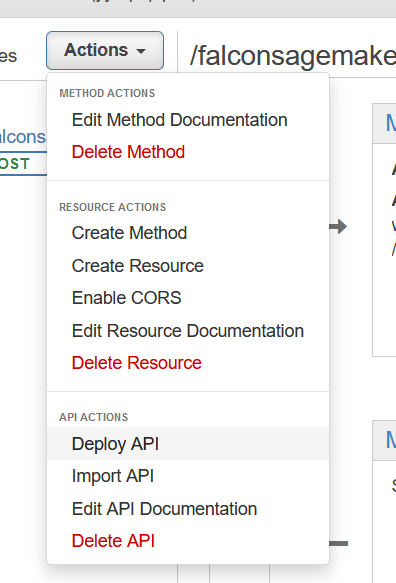
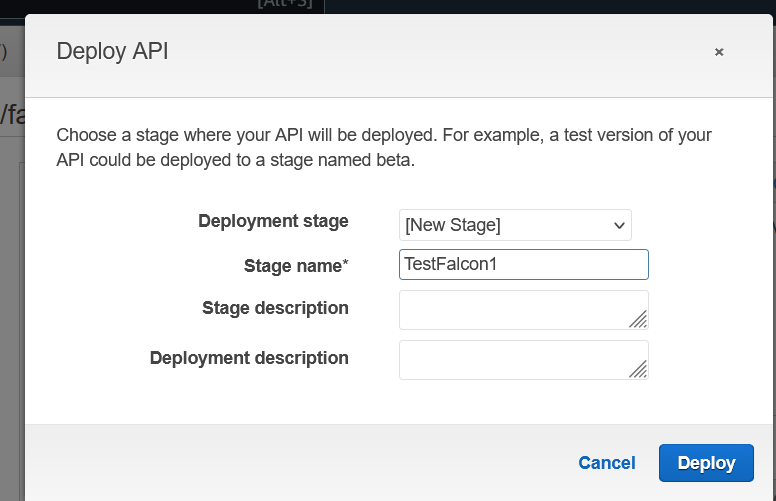
Finally, to make your API available for use, retrieve its corresponding URL, and make any updates available, you must deploy your API from the Actions drop-down menu
You will be prompted to select a Stage to keep track of your deployments, which you can customize and organize however you see fit.
Once deployed, you will be able to access your URL for invoking your API in the Stages section of your API.

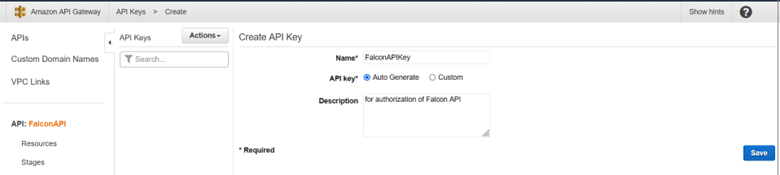
For authentication purposes, you must create an API Key so that your API is available only to authorized users and applications,as this key allows use of this API.
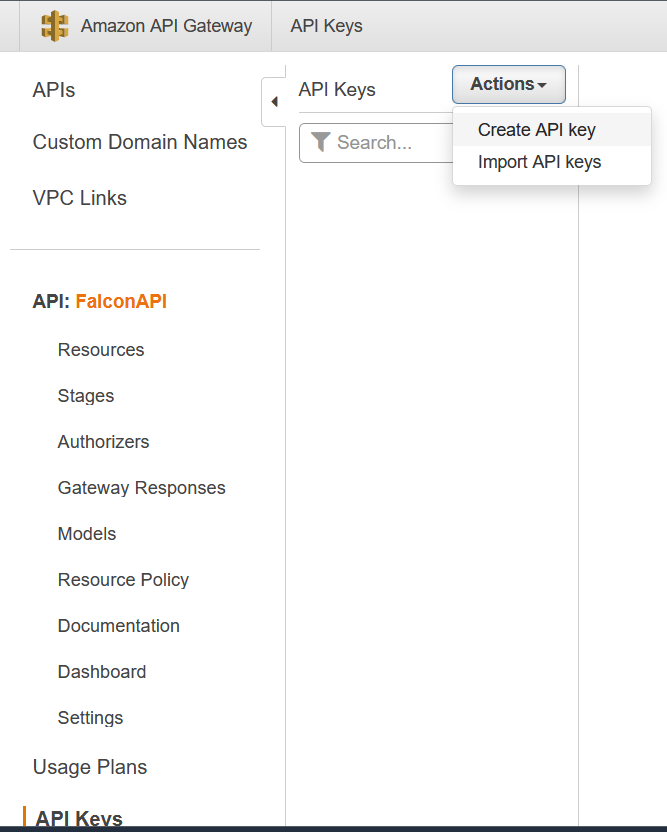
Go to API Keys, and click in Create API Key in the Actions menu. You can name your key and set it to either be auto generated by AWS or enter your own value. Once this key is saved, you will be able to use it from your API as shown in the React code previously. This will prevent the Authentication Token Missing error, which prevents you from using your API, even when using the Invoke URL.
Note that every time you would like to apply new changes to the API, you must deploy the API again.
SageMaker Configurations (Final Step):
This article uses the same code and configuration as the first blog with minor changes to use Falcon-7B instead of Falcon 40B.
In the serving.properties file, edit the tensor_parallel_degree option to be 1 in order to use a single GPU and the model_id option to use Falcon7B.
					%%writefile ./code_container/serving.properties

engine=Python

option.model_id='tiiuae/falcon-7b'

option.tensor_parallel_degree=1
In the model.py file, edit the model name variable in the get_model method to be falcon-7b:
model_name = 'tiiuae/falcon-7b'
In the endpoint configuration, change the instance type to ml.g5.2xlarge.
					endpoint_config_response = maker.create_endpoint_config(
    EndpointConfigName='falcon7b-model-ds-cf',
    ProductionVariants=[
        {
            "VariantName": "falcon7",
            "ModelName": model_name,
            "InstanceType": 'ml.g5.2xlarge',
            "InitialInstanceCount": 1,
            "ModelDataDownloadTimeoutInSeconds": 1200,
            "ContainerStartupHealthCheckTimeoutInSeconds": 1200,
        },
    ],
)
You can change your model_name_acc, enpoint configuration name, and endpoint name to reflect using falcon7B instead of 40B.
This change from falcon 40B to 7B is better to suit the relatively small workload of handling user input and more optimized with lower latency using one GPU. This is convenient for our real-time chat feature.
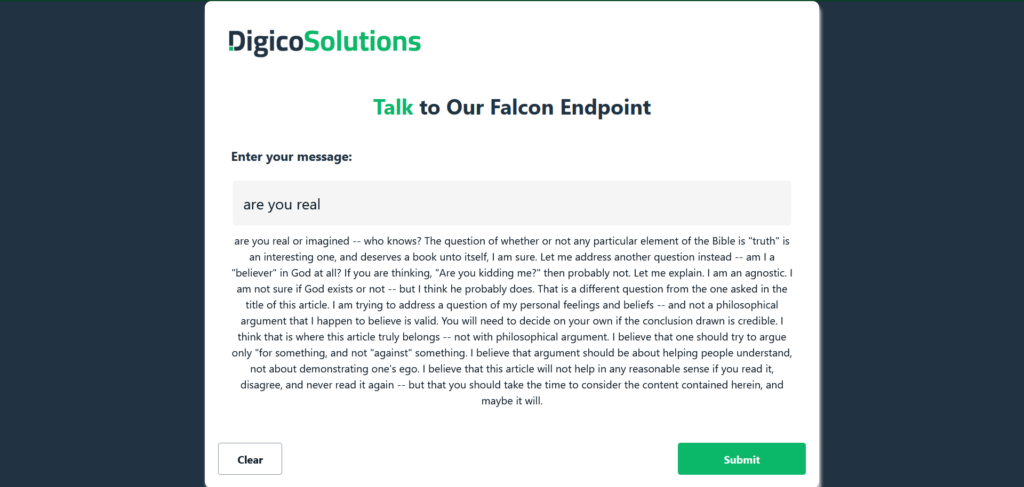
Talk to Falcon
To test all your work, enter your message and submit the form. As shown below, you will get a cool response from Sage Maker rendered on your webpage!
What’s Next?
In our next article, we will learn how deploy this UI using AWS Amplify and Create CI/CD pipelines for it using AWS DevOps tools. Stay tuned!
Conclusion
Throughout this article, we have explored the key considerations and best practices for designing and building a UI that effectively interacts with a SageMaker endpoint. Creating a UI for interacting with a SageMaker endpoint empowers end users to harness the power of machine learning models effortlessly. By leveraging the appropriate technologies you can create an intuitive experience for users to easily leverage the capabilities machine learning and unlock the potential of their data.